
How to run Linux inside of Windows or OS X using VirtualBox
In recent years, interest in the Linux family of operating systems has grown steadily, despite continued heavy investments by Microsoft and Apple in their respective proprietary OS'es. According to one source, Linux market share has gone from just around 2% in 2003 to about 5% in 2012. That may not seem like much, but compare it to Mac OS X, which went from under 2% to around 9% in the same amount of time, with the backing of Apple's huge advertising budget and hardware support. Not to mention Microsoft's advertising luring people to their side as well.
So why are people interested in Linux? I won't go into too much detail here, because I assume if you made it here, you're convinced Linux is worth a try. But for starters, it's free and open source, it's very secure and stable, it comes in hundreds of different distributions, and it's increasingly user-friendly as well.
There are a few different ways to try out an operating system. One way is to simply install it, which requires either writing over your current hard drive, installing onto a new blank hard drive, or creating a partition and installing to that. This is probably the most time consuming method, but is best for a permanent installation. Another way is to run it from a Live CD or Live USB drive. Several Linux distros are custom built to utilize this method in particular, and many Linux distros do it pretty well anyways. But this is another method which requires you to shut down your computer and run Linux outside of your current operating system. The final method, and one we will be using here, is to set up a Linux virtual machine which runs inside of your current operating system.
Step 1: Install VirtualBox
The software we will be using to set up a virtual machine is called VirtualBox. It is free software used for virtualization, and can be used to set up virtual instances of Linux, as well as Windows and Mac. Just go to the VirtualBox website and click on the version for your operating system to download the installer. Installation should be pretty self explanatory, just open the installer and click next until it's done!
Step 2: Download a distribution of Linux
There are literally hundreds of different distributions out there, including general purpose distros, file recovery distros, penetration testing distros, etc. Picking out a distribution is beyond the scope of this article, but two that I often recommend are Ubuntu and Mint Linux. These are both user-friendly distributions intended for a general audience, are very popular, and therefore have large communities willing to lend support for various problems.
They are both based, to a large degree, on Debian, one of the oldest distributions of Linux, but also one of the most secure, and a very strict follower of free and open source software (FOSS) principles. Debian lacks some of the polish of more recent distros, but serves as a base for many newer distros, and is known for working on almost any hardware setup. I will be using Debian for the rest of this tutorial, but as long as you have your favorite distro downloaded in .ISO format, you're good to go. Make sure you have the correct version for your processor type as well.
Step 3: Create a new virtual machine in VirtualBox
I'm using Mac OS X for this tutorial, but the dialogs should be more or less exactly the same on any OS. When you open up VirtualBox, you should see this window:
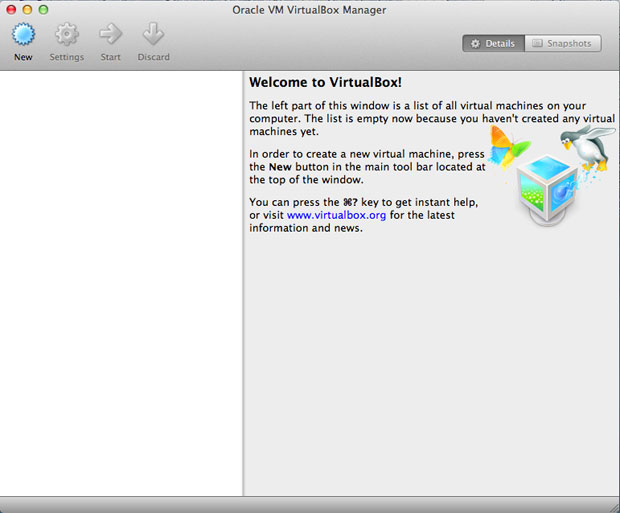
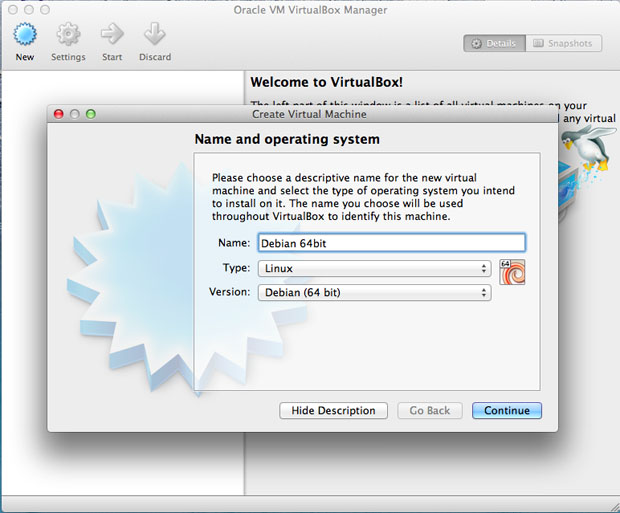
You'll want to click on the "New" button in the top left, then you will see the "Create Virtual Machine" window pop up. Go ahead and select "Linux" for type, and then select the corresponding version. If your distro isn't on the list, you can just select "Other Distro". Then give it whatever name you'd like, and click continue:
Next, we'll select an amount of RAM to allocate to this virtual machine. Most Linux distributions have very reasonable system requirements, so you usually won't need that much RAM. VirtualBox recommends an amount for you, but for most distros, I do 512MB. If you're using a more feature-rich distro, such as Ubuntu, I would recommend 1GB of RAM, but keep in mind how much RAM you have on your actual computer. I wouldn't go above 1GB unless you have more than 4GB of RAM on your computer. After picking an amount, click continue: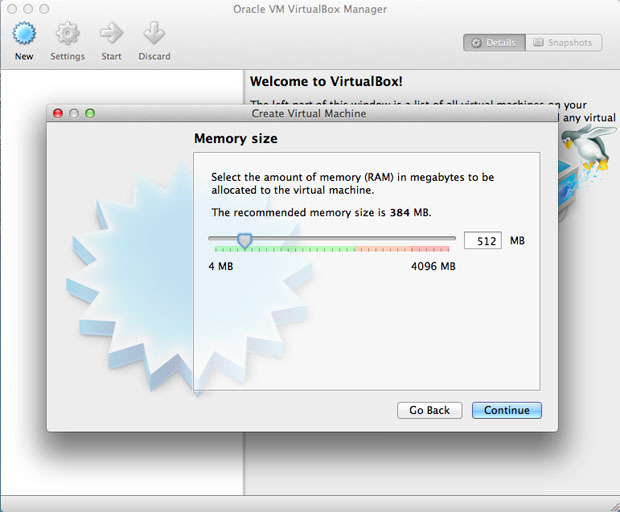
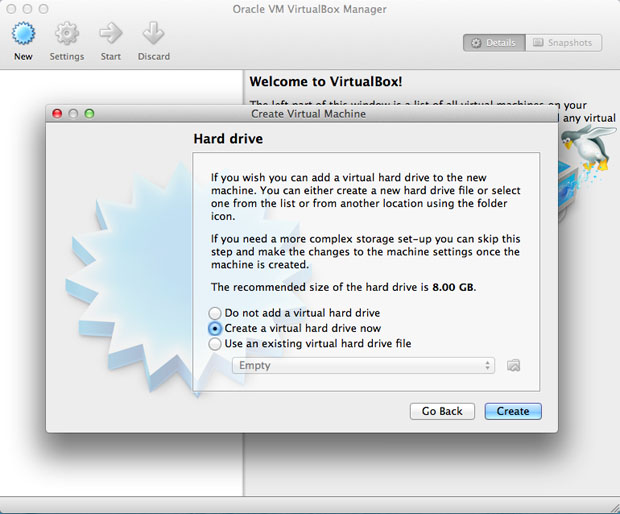
Next, we will create a virtual hard drive for the VM. If this is your first time using VirtualBox, you will most likely be creating a new virtual hard drive, so select that option and click create:
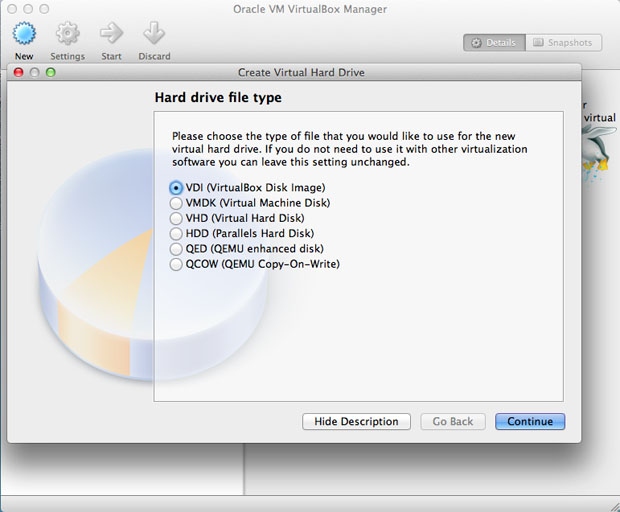
Go ahead and select the first option, VDI, and click continue:
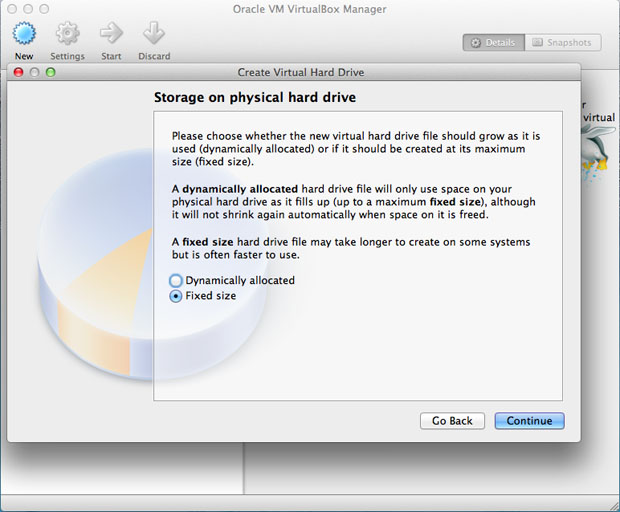
For this next option, you'll have a choice to make between two hard drive types. Regardless of which you pick, you'll pick a size for the hard drive on the following step. A fixed size HD will immediately gobble up the full size that you pick on your actual hard drive, whereas a dynamically allocated HD will only use enough space on your hard drive to fit the files that are placed on it. So for example, if you create a 8GB virtual hard drive with 200MB of files on it, a dynamically allocated drive will take up 200MB on your physical hard drive, whereas a fixed size drive will take up the full 8GB right away. There's a bit of debate on the merits of each option online, but for my purposes, I'm choosing fixed because it offers a performance boost over dynamically allocated. So go ahead and pick a storage type and click continue:
After doing that, select a size for your new hard drive. For testing purposes, I usually do an 8GB drive, but this will depend based on how much free space you have on your physical hard drive, what you'll be using it for, etc. After doing that, click create, and VirtualBox will create the drive as shown: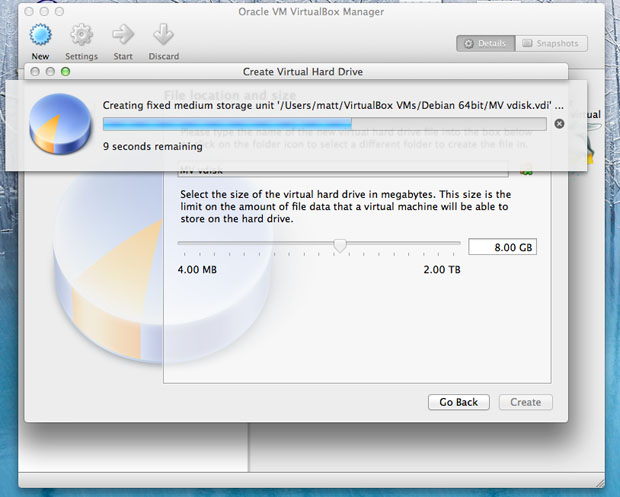
After that is done, you should see your virtual machine listed on the left. To install the actual operating system, go ahead and click on settings, in the top left: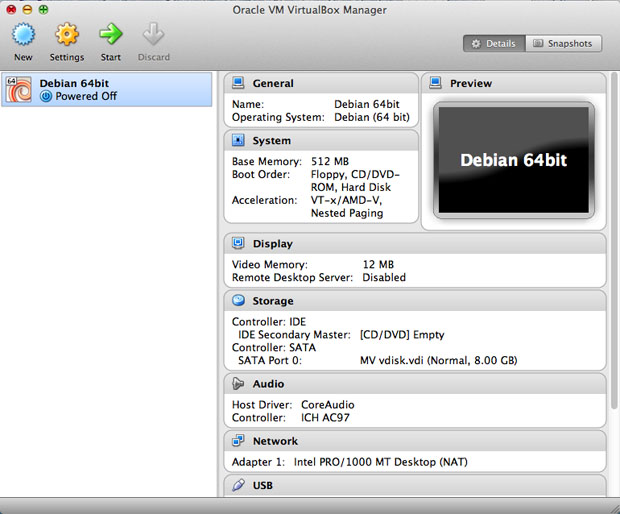
You should then see this settings window pop up: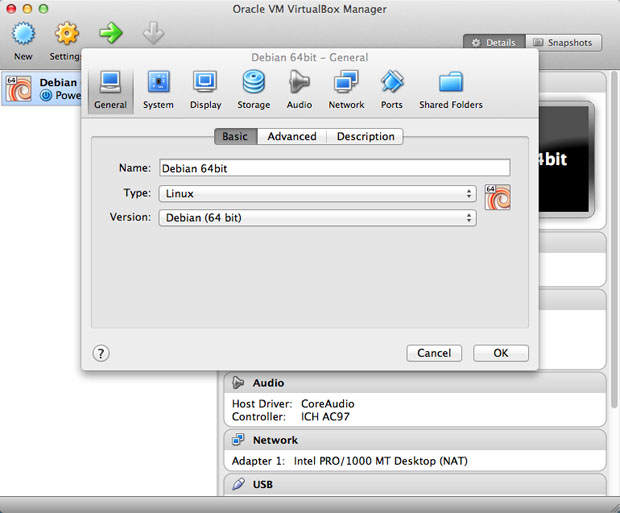
Go ahead and click the "storage" tab, then select "Empty" under "Controller: IDE":
After you select that drive, you should see the following on the right side of the window. Click the CD icon, then when the menu below appears, click on "Choose a virtual CD/DVD disk file..." A file browser should pop up - just navigate to the ISO file you downloaded and select it.

The file name for the ISO should then show up in the drive. Go ahead and click "OK" to close the dialog box, then click the green "Start" arrow in the top left to start the VM: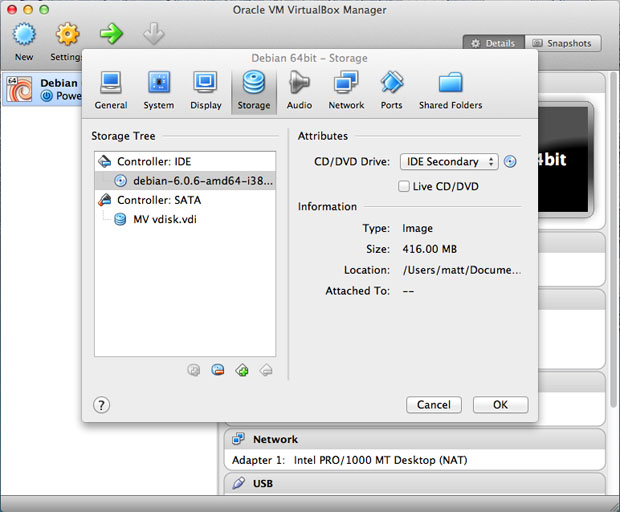
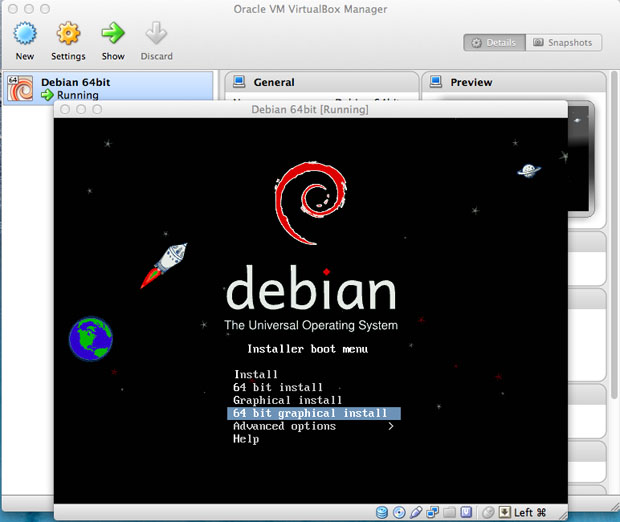
After you click the green arrow, the virtual machine will boot up, just like an actual computer. It will detect the boot disc in the "drive", and boot your ISO. Some ISOs boot to an actual desktop, where you can try out the OS before installing. In this case, the Debian ISO I downloaded simply boots directly to a installer. Either way, at this point you will want to install your particular distro to the virtual hard drive we just created:
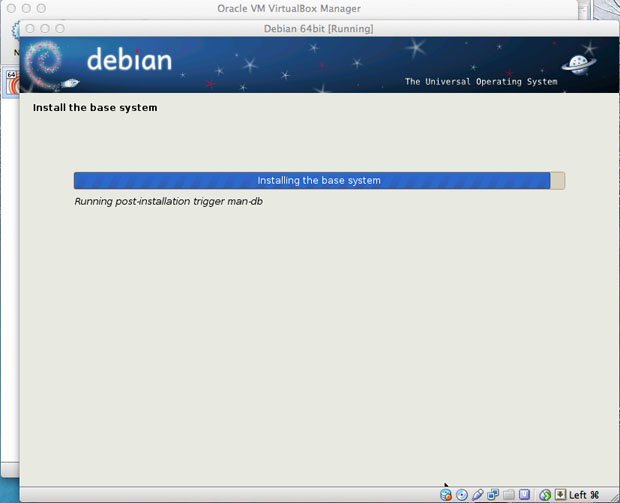
Here we see the Debian installer running in the VM window:
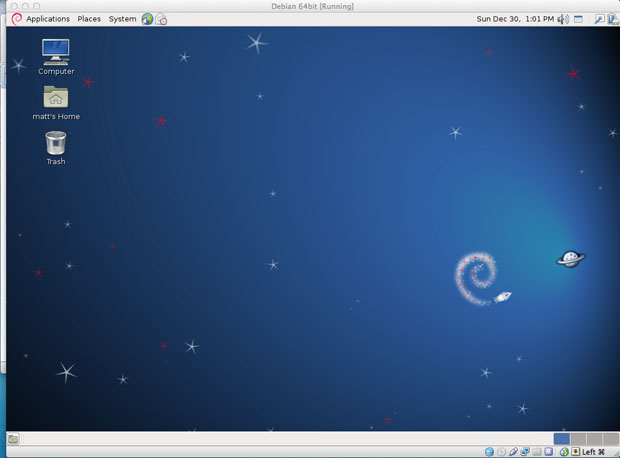
And finally, here we see Debian 64-bit running in a window on my Mac! Ta-da!:
And that should be all you need to get up and running! To shut down your virtual machine, you should use the shutdown dialog within the distro you installed, as you would if it was on a standalone computer. VirtualBox will receive the shutdown signal once it's safe to turn off, and terminate the virtual machine.
NOTE: If you don't have hardware assisted virtualization turned on in your computer's BIOS, you will have serious problems running any virtual machine. Most Intel-based Macs should have hardware virtualization turned on by default, but on Windows PCs it is sometimes turned off at the factory, presumably for security reasons. This Microsoft support page explains how to turn it on. If you have any other questions, just leave a comment!
|
Older:
Hello world! |
Newer:
Bad news for Microsoft: Windows 8 adoption even slower than Vista |